
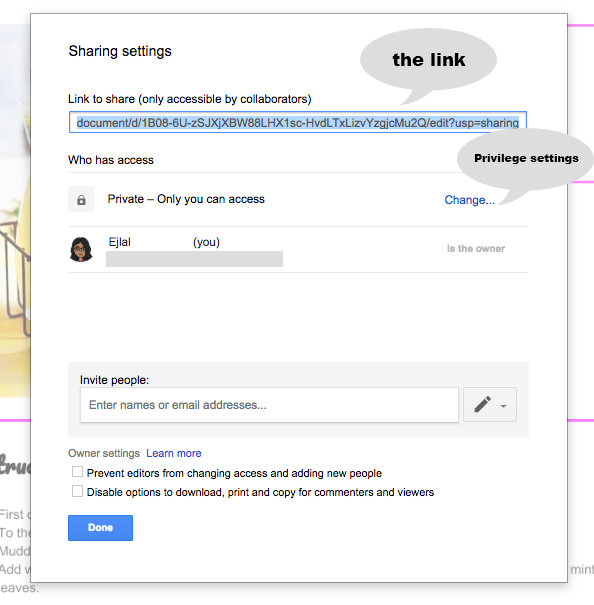
Step 1: Click on the Share button ” Share “
Step 2: a popup window will appear, with tiny text in the right-hand side on the bottom of the box written “Advanced“, click over the word “Advance”

Step 3: After Click over “Advanced” will show extra sections as below image
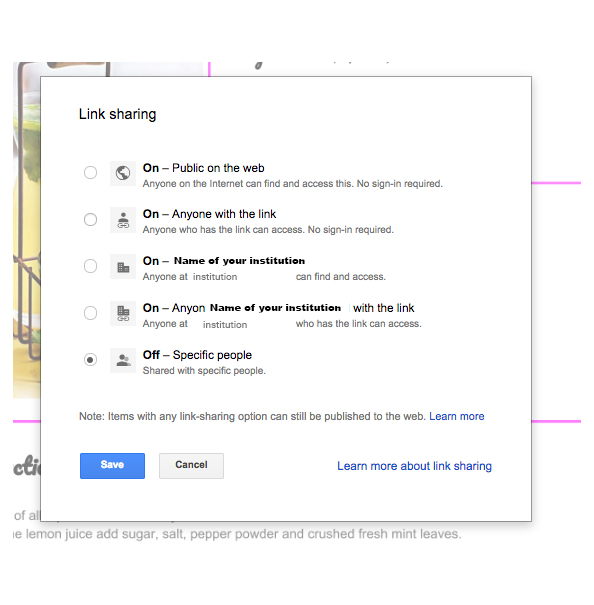
Each selection will have a different type of access and use as will be mention below :
1. on – public on the web: anybody at global who able to get his/her hand on doc somehow ( from google search engine, get a link from someone, shared with , ….etc ) will be able to access this document without login into Google account.
2. on – Anyone with link : anybody at global who will get this link will able to view the content without the need to login into Google account
3. on-name of your institution: anybody in the institution will have an access for this document, and would be listed in Share docs section in google drive. ( This option available for Gsuite Business or Education )
4. on-Anyone at the institution with the link: anybody from the institution with the link will have an access which means they would need login with institution Google.
5. off – Specific people: Just specific people who have been listed within “who has access” list which also means is going to be listed within the shared drive section.
Step 5: Select the best option to fit your needs and press Save button
Step 6: After that Click Done from Sharing Settings Window